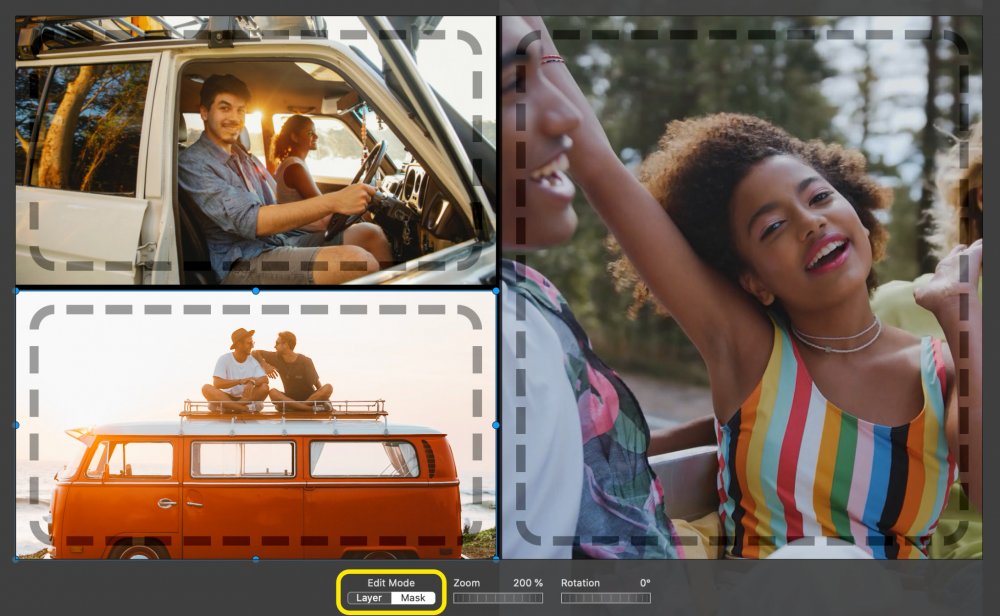
The Stage displays the layers of the currently selected slide. The layers can be freely zoomed, positioned, and rotated on the Stage. In addition to the slide layers, there may also be an optional background layer and an optional foreground layer (watermark). Both can be set by selecting the Settings… from the Slideshow menu.
If animation is enabled for a slide, the stage is displayed twice. The start of the animation is displayed on the left side, and the finish of the animation is displayed on the right side. That way you can quickly drag around the layers to create the desired animation effect.
Dragging to the Stage
Drag media files from the Finder or a media browser in the Sidebar to the Stage to add a new layer.
If you want to replace the media files of a existing layer, press the ⌥ key while dragging a media file over the layer. The layer will highlight in yellow to indicate that its media files will be replaced once you drop the new file.
Positioning Layers
You can position, zoom, and rotate layers on the Stage in several different ways:
- Click on a layer to select it. The layer displays a thin white outline and resizing control points at the corners to indicate that it is selected. This layer will also be selected in the Storyboard or Timeline.
- Drag the layer around on the Stage to reposition it.
- Click on one of the control points at the corners and drag to resize the layer. Note that this modifies both the position and zoom values.
- Use the jog wheels at the bottom of the Stage to change the zoom or rotation values of the selected layer.
- Optionally, you can also enter the zoom and rotation value numerically in the text fields above the jog wheels.
- Press the ⌥ key and click on a layer and drag up/down to change the zoom value.
- Press the ⌘ key and click on a layer and drag around its center to rotate it.

Guidelines & Grid
As layers are positioned, zoomed, or rotated on the Stage, various guidelines will appear to help you align them. By default layer snap to these guidelines:
- Green guidelines help to snap to the center or the edges of the Stage.
- Yellow guidelines help to align an layer with its position on the opposite side of the Stage. This is helpful when creating certain animation effects, e.g. a completely horizontal pan across an image, without any vertical motion and no zooming effect.
- Gray gridlines help to align the layer with the grid that was defined in Preferences.
💬
Use the yellow guidelines to create perfectly horizontal or vertical panning animations.
💬
Press the ctrl key to suppress automatic snapping to the guidelines.
Editing Masks
When a selected layer has a mask, a switch will be displayed next to the zoom and rotation jog wheels. With this switch you can select whether the jog wheels affect the layer geometry, or the mask geometry. Switching from “Layer” to “Mask” turns the white selection frame to a blue selection frame – indicating we are now in mask editing mode. Using the jog wheels, or any dragging with the mouse now affects the mask, instead of the layer.

💬
Double-clicking a layer with a mask selects it and directly enters mask editing mode.
