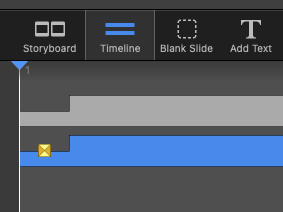
This section describes how to adjust slide durations, audio fade-ins/fade-outs, audio volume and sync images to audio. First switch to Timeline view by clicking on the Timeline button.

Then select an appropriate timescale by using the slider at the bottom left of the window. By dragging the slider to the right, you zoom in horizontally, and any adjustments you make to the timing will be more precise.

Adjusting Duration Manually
The Timeline view displays slides as a rectangular bar with the width being proportional to the slide duration. The longer the duration, the wider the rectangular bar. Where a slide overlaps with the next slide, a “stair step” shape is displayed. This stair step is called a transition interval. The middle of the transition interval displays as an icon that indicates the type of transition. When you drag the lower half of the vertical edge (A), you adjust the slide duration. When you drag the upper half of the vertical edge (B), you adjust the transition duration.

- To adjust the duration of the slide, click the lower half edge (A), and drag to the left or right. The cursor changes to a directional arrow as you drag and the width of the slide changes.
- To adjust the duration of the transition, click the upper half edge (B) and drag to the left or right. The cursor changes to a directional arrow as you drag, and the width of the transition interval changes.
Any changes you make by dragging in the Timeline view are also displayed in the Slide Options in the sidebar.
Syncing to Audio Manually
Timeline view displays the waveform for each audio item. This visual representation of the audio waveform allows you to locate certain points of a song (or effect or narration) by identifying high amplitudes (louder sound) or low amplitudes (quiet sound). You can then adjust slide durations so that transitions occur at the appropriate time. For example, you might want to start a slide at a certain point when the audio increases in volume. The waveform helps you to visually pinpoint the exact location.

⚠
Synchronizing your slides with audio in this manual way has a big drawback: If you change any slides before the current location, everything might shift horizontally and synchronization would almost certainly be lost. For this reason FotoMagico also offers audio markers as a better, more robust mechanism for synchronizing slides to audio.
Syncing With Audio Markers
Audio markers are indicators for important times in an audio track. In a song audio markers would be placed the beat of the music. Markers are displayed as thin red lines on top of the audio waveform. Markers can be active (opaque red line) or inactive (transparent red line). Only active markers are used for synchronisation.
When audio has markers and the slides above the audio track are set to continue “At Audio Marker”, then the transition to the next slide always happens when the currently playing audio passes an active marker. This helps to stay in sync, even if something preceeding the current slide was changed.

There are several different ways to add markers to sychronize your slides with audio:
- Drag in a music snippet from the Snippets browser. These audio track already come with audio markers.
- Add audio markers to an existing audio track with the Audio Marker Assistant
- Right-click on an audio track in Timeline view and select Add from the Audio Marker submenu of the context menu.
To delete audio markers you can:
- User the Audio Marker Assistant
- Right-click on an audio track in Timeline view and select Delete from the Audio Marker submenu of the context menu.
Editing Video by Cutting Slides
While scrubbing in Timeline view, you can cut the slide that is currently visible in the Stage into two separate slides by pressing the C key. The slide will be cut into two separate slides at the current playhead position.
This is especially useful for editing long video sequences. Place a long video clip into the timeline. Then click on the playhead and start dragging it to scrub through the video. The Stage will display the video at the current playhead time. Whenever you wish to cut the video, press the C key. You can do this multiple times. When you are done, release the mouse button. You now have multiple slides instead of the initial single slide. You can now select and delete those slides whose video segments you do not want.
💬
This techniqhe is not restricted to slides with video. You can also cut slides that contain images or titles.
