With a mask you can can hide part of a layer. There are two types of masks: rectangular and oval. In addition a mask can have a soft edge to achieve certain special effects.
Adding a Mask
There are several ways to add a mask to a layer. First select the layer.
- Select a shortcut from the Mask submenu of the Slideshow menu.
- Right-click the layer in the Stage or Storyboard and select a shortcut from the Mask submenu of the context menu.
- Go to the Image Options, expand the Effects list and Mask, then click on a mask shortcut button

Adjusting Mask Parameters
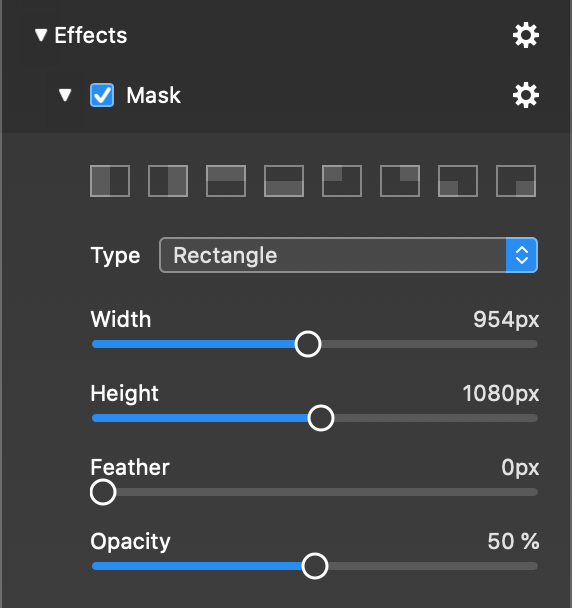
All of the shortcuts create commonly needed masks, like left or right half of the Stage. In some cases you may need a mask of different dimensions. In this case simply drag the Width and Height sliders or enter the pixel size numerically. You can also adjust the softness of the mask edge by changing the Feather parameter. Reducing the Opacity makes the mask partially transparent.
If you want a round mask, change the type from Rectangle to Oval. Oval masks are particularly useful with soft edges to create a vignette effect.
Adjusting the Mask in the Stage
The mask can be positioned, size and rotated in the Stage. To do this change the switch next to the Zoom and Rotation jogwheels from Layer to Mask. The layer selection frame turns from white to blue, indicating that you are now in mask editing mode.

You can now click and drag inside the blue frame to position the mask. Click on on the the control points to resize the mask. Use the jogwheels to zoom or rotate the mask.
💬
Double click a layer on the Stage to quickly switch between layer and mask editing mode.
💬
While you are positioning or resizing a mask, its opacity will be temporarily reduced, so you can see the layer content, which helps in correctly positioning the mask.
Animating Masks
Masks can be animated independently of the layer content. You can have
- Animated layer content with a static mask
- A static layer with an animated mask
- An animated layer and an animated mask
To animate a mask, simply position, zoom, and rotate it differently for the start and finish of the animation.
💬
Please note that the size of the mask will be constant for the whole animation. Only position, zoom, and rotation can be animated.
Image Masks
Starting with FotoMagico 6.4 you can also use a grayscale image as a mask, in addition to rectangular or oval masks. Here’s an example of what you can achieve that way:

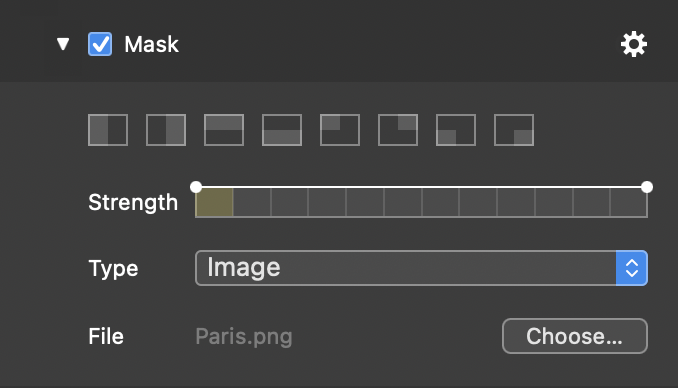
Switch the mask type to “Image” and choose a grayscale image file to be used as the mask.

💬
Areas that are white in this mask image will be visible, areas that are black will be hidden.
💬
Single channel PNGs are preferred, but you can also use other file formats. When choosing an image file with alpha channel, then the alpha channel will be used instead.
