You can add a text layer in two different ways:
- Select a slide, then click on Add Text in the toolbar.
- Drag a text snippet from the Snippets browser to the Storyboard. Refer to Using Snippets for more info.
Double click the text layer to start editing the text. While editing a text layer, there are only two control points on the selection frame, one on the left and one on the right. Drag any of these two control points to change the width of the text layer. This affects line wrapping for multi-line text.

To end editing a text layer, simply click outside the layer or press the Enter key on an extended keyboard.
Text Formatting
Text can be formatted with various commands in the Edit menu and the OS X Font panel. However, it is much more convenient to use the formatting controls in the Text Options.

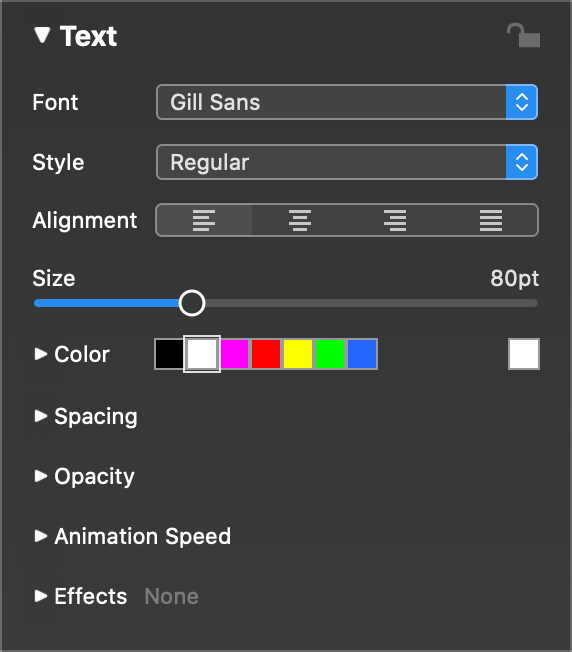
Use the Font, Style, Size, and Color controls to quickly change the style of the text.
Use the Alignment buttons to choose left, right, center, or block alignment. Please note that for alignment to be really useful, you often have to make sure, that you text layer has the proper width. To change the width of a text layer, drag one of the two control points on the selection frame and drag it left or right, until you reach the desired width.
If you use the formatting controls while a text layer is in editing mode, then the controls apply to the currently selected text. That way you can use multi-styled text. If you are not in editing mode, then any formatting changes always apply to the whole text of a layer.
Use the Kerning and Leading jogwheels in the Spacing section to adjust character and line spacing.
Text Placeholders
Text placeholders are tokens that can be inserted into a text layer. They will be replaced with the actual values when the text layer is rendered on screen. An example is <AUTHOR>, which will be replaced with your name.
To insert a placeholder, select an item from the Insert Placeholder submenu of the Edit menu. You can also type the placeholder directly, but in this case you need to make sure that you type the placeholder exactly as described in this manual. Any text formatting that you apply to the placeholder remains intact when the placeholder is replaced with the real information.
The following placeholders can be entered in the Slideshow Info section in the Settings:
<SLIDESHOW-TITLE> | Inserts the title of the slideshow |
<SLIDESHOW-SUBTITLE> | Inserts the subtitle of the slideshow |
<SLIDESHOW-DESCRIPTION> | Inserts the description of the slideshow |
<AUTHOR> | Inserts the name of the author |
<ORGANIZATION> | Inserts the name of your organization |
<COPYRIGHT> | Inserts the copyright info |
<EMAIL> | Inserts your email address |
<URL> | Inserts your web page URL |
The following placeholders depend on the contents of the slideshow:
<SLIDE-COUNT> | The total number of slides in this slideshow |
<SLIDE-NUMBER> | The number of the current slide |
<SLIDE-NOTES> | The slide notes (for the teleprompter) of the current slide |
<CHAPTER> | The current chapter name |
<TODAY> | Today’s date |
<SLIDESHOW-CREATION-DATE> | The date this slideshow was created |
<SLIDESHOW-CREATION-YEAR> | The year this slideshow was created |
The following placeholders always depend on the image layer directly below the text layer containing the placeholder:
<IMAGE-FILENAME> | The filename of the image file |
<IMAGE-TITLE> | The EXIF or IPTC image title (if available) of the image file |
<IMAGE-CAPTION> | The EXIF or IPTC image title (if available) of the image file |
<CAPTURE-DATE> | The capture date of the image |
<CAPTURE-TIME> | The capture time of the image |
<EXPOSURE-TIME> | The exposure time of the photo |
<APERTURE> | The aperture of the photo |
<FOCAL-LENGTH> | The focal length of the photo |
<ISO-SPEED> | The ISO speed of the photo |
The following placeholders depend on the all audio tracks contained in this slideshow:
<AUDIO-SONGS> | The name of all songs used in this slideshow |
<AUDIO-ALBUMS> | The name of all albums used in this slideshow |
<AUDIO-ARTISTS> | The name of all audio artists used in this slideshow |
<AUDIO-URLS> | The URLs (if available) of all songs used in this slideshow |
<AUDIO-CREDITS> | The complete audio credits for this slideshow |
The <AUDIO-CREDITS> placeholder is the basis for the music credits slide, that is required when using any of the royalty free Creative Commons licensed music. Always make sure that you do include a slide with music credits at the end of the slideshow!
Text Effects
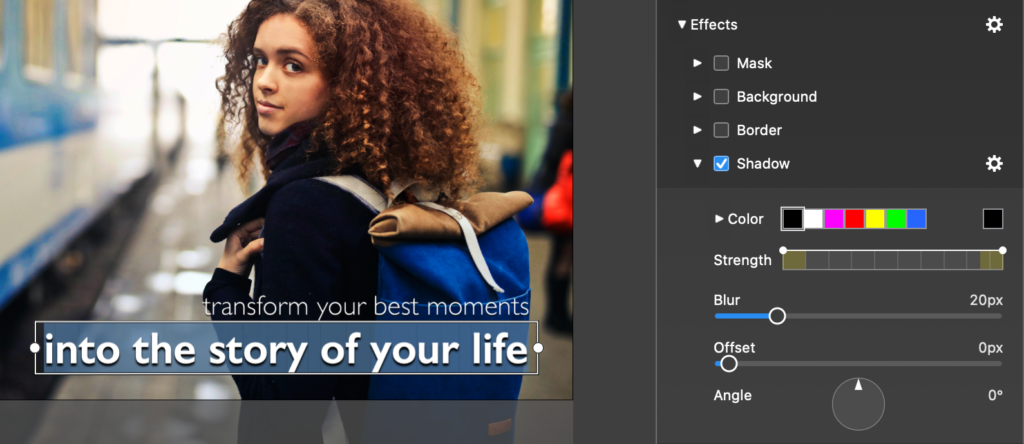
Text layer effects like Mask, Background, Border, Shadow, and Blur can be used to achieve various interesting things:
Text Shadow
When placing a text layer on top of an image, video, or map, the text can sometimes be hard to read if it has a similar color as the background. In this case applying a shadow can help to better separate the text from the background.

Lower Thirds
The fastest way to create a lower third is to drag a pre-built lower third text snippet from the Snippets browser. However you can also create lower thirds manually:
- Enable the Background effect on a text layer
- Choose Box shape
- Adjust the Padding H and Padding V values to get the desired text inset from the box edges
- Choose a background color and reduce the opacity
- Enter text editing mode and adjust the text layer width to match the width of the Stage

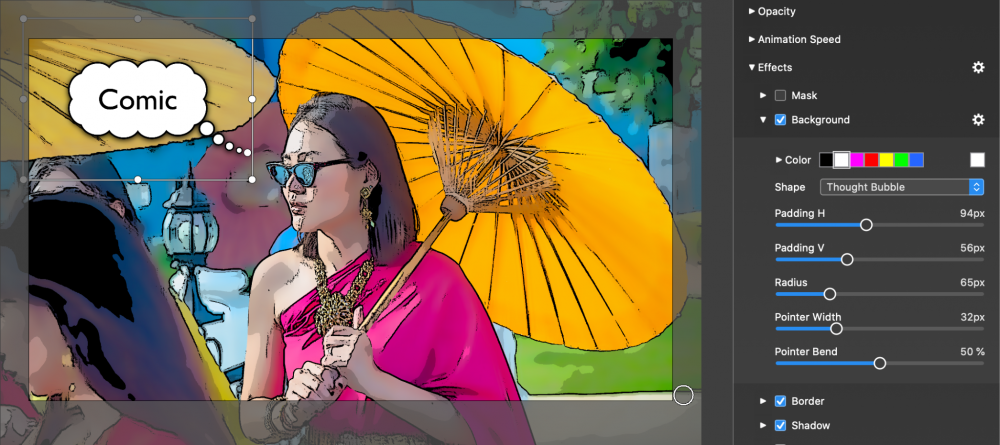
Speech Bubbles
To create speech, thought or action bubbles, you can once again use the pre-built snippets from the Snippets browser. To Create speech bubbles manually follow these steps:
- Enable the Background effect on a text layer
- Choose Speech bubble shape
- Adjust the Padding H and Padding V values to get the desired text inset from the box edges
- Choose a white background color and black text color
- Enable the Border effect with black color
- Drag the speech bubble tail to an appropriate location, e.g. near the head of a person

