Enhance Your Slideshow with Map Layers and Animated Travel Routes
This guide will show you how to create and edit map layers, highlight specific locations, and add animated travel routes that bring your journeys to life. This guide provides step-by-step instructions on the various features and customization options available within the Map Assistant. Let’s embark on this cartographic journey to elevate your slideshows and engage your audience.
Creating and Editing Map Layers
To create a new map layer, click on Insert Map in the toolbar, or select Map Assistant… from the Slideshow menu or use the shortcut and press ⌥+⌘+4. This will open the Map Assistant. When you are done editing the map in the assistant, click on OK to create the map layer.
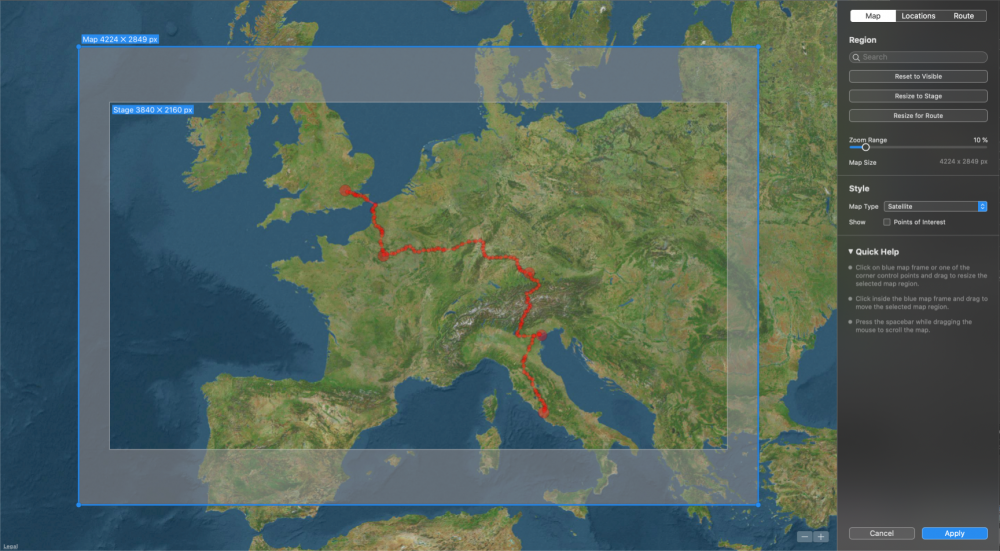
To edit an existing map layer, select it and open the Map Assistant again. You also can open this assistant via the layer context menu or the Edit Map & Route… button in the Map Options.
Sidebar
The assistant displays a large map view and three tabs in the sidebar on the right side: Map, Locations, and Route.
Use these tabs to edit the map layer. The Map tab controls the area and appearance of the map. The Location tab lets you add markers for specific locations. The Route tab allows to add to create a travel route.
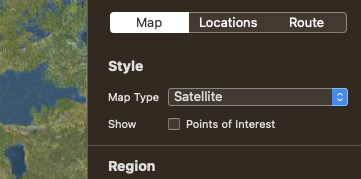
Map
The Map tab in the sidebar lets you choose the map style and the map region. The blue frame in the map view indicates which map region will be rendered. You can move this blue frame by dragging it. Drag the corner points or edges of the blue frame to resize it. A label will always display the map dimensions in pixels.
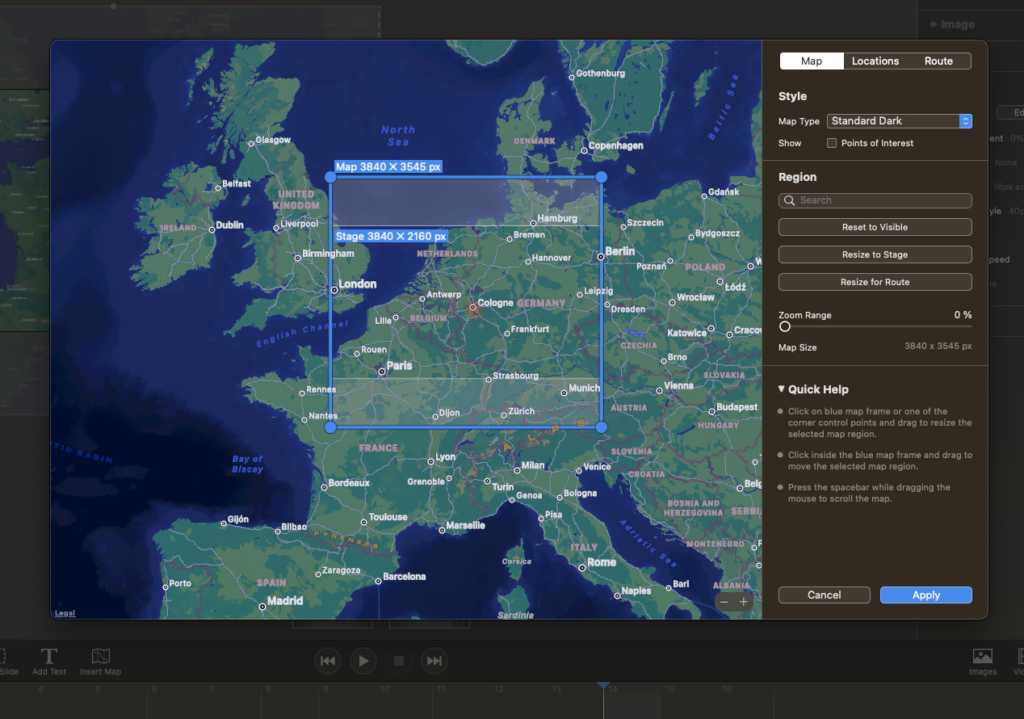
If you scroll or zoom the map view, the blue frame may move outside the visible area. Click on Reset to Visible to move the blue frame to the currently visible region.
💬
If you want to add a zoom effect to your map, it should be a little bigger than the Stage size of your slideshow, or pixels will get blurry when zooming in. An example: for a 4K slideshow (3840 × 2160) and a 10% zoom range the map should be at least 4224 × 2376 pixels in size. Simply setting the Zoom Range slider to 10% automatically takes care of that.
Map Style
You can choose from four different map styles or you use a custom image (e.g. a scanned map or a photo).
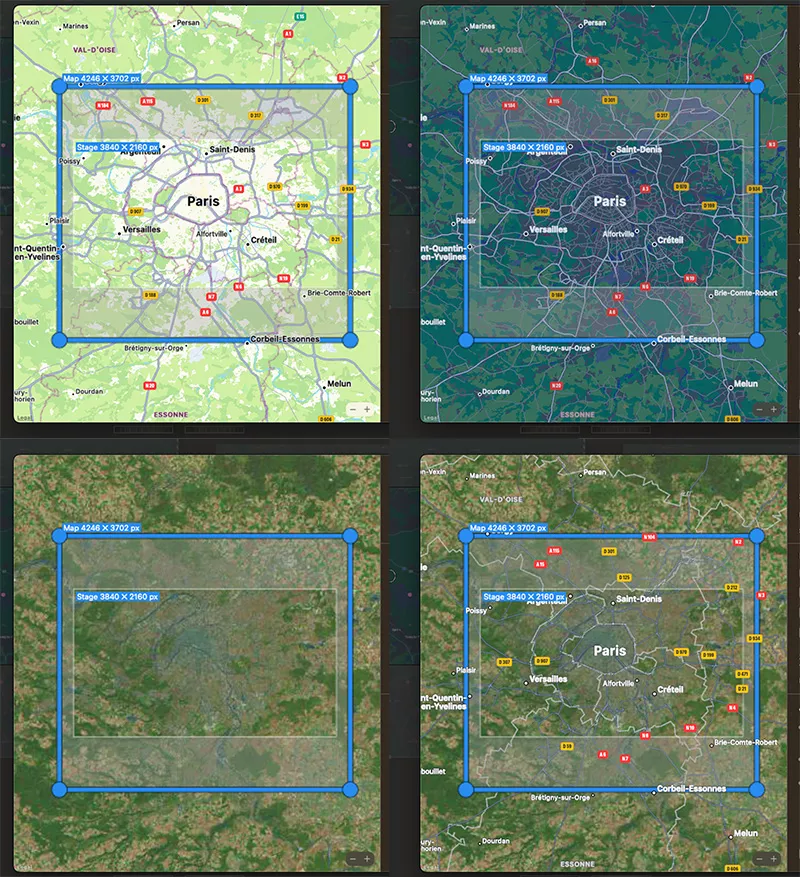
The visual appearance of the rendered map can later be customised by applying layer effects. This is done outside the Map Assistant. The various combinations of map style and layer effects takes a bit of experimentation to find the exact right match.
Locations
The Locations Tab is designed to let you highlight specific places on your map. Locations are displayed as circular dots and are always visible on the map, i.e. they are not animated.
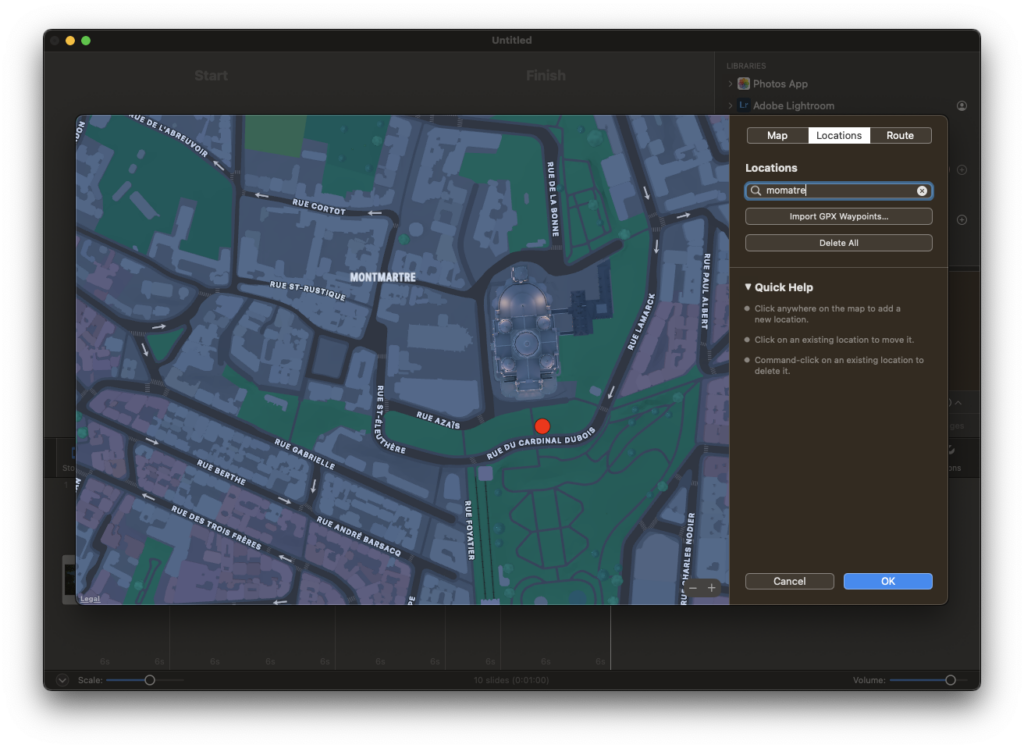
There are a few ways to mark a location:
- Simply click on the map where you want to add a dot.
- Alternatively, right-click on your desired spot and choose Add Location.
- Click on Import GPX Waypoints… to load the waypoints from a GPX file. This is a file format that records GPS data. Any recorded tracks in this file will be ignored and only single waypoints will be added.
- To remove a location, right-click on the dot and choose Delete Location.
With the Locations Tab, it’s super easy to pinpoint all the places you’ve been to, making your slideshow both informative and visually appealing.
⚠
If you want a label for a location you currently have to add a separate text layer above the map layer and position it next to the location dot.
Route
In the Route tab you can create an animated travel route. Maybe you want to show the paths you’ve taken during your trips. You have two options to create a travel route:
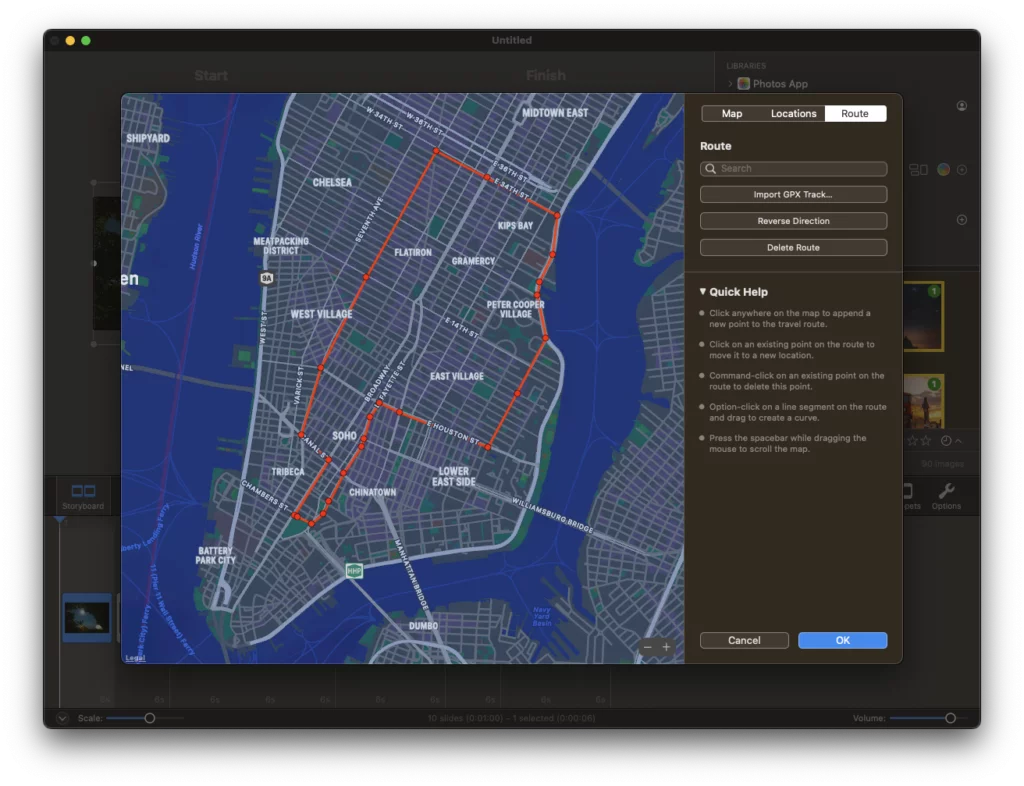
Creating a route animation
- Manual Creation: Prefer to draw it yourself? Click on the map to start your route and keep clicking to trace your entire journey.
- Using a GPX File: If you have a GPS device, fitness watch, or use certain online tools, they might give you a GPX file. This file records your travel path. Just import it here for an instant route on your map. Importing an existing GPX file is by far the simplest method to create a travel route.
Edit a route
You can easily edit your existing route. A route is a sequence of route points. The route will be animated during playback. A route point can be marked as a waypoint. Waypoints will be drawn with a larger radius. They usually mark important spots, along your travel route.
- To adjust a point on your route just click on it and drag it to a new position.
- To delete a point, hold the ⌘ key and click on it, or access the popover with a right-click on the point.
- To create a curve between two route points, hold down the ⌥ key, then click on a line segment between the two points and drag to the side where you want the curve to go.
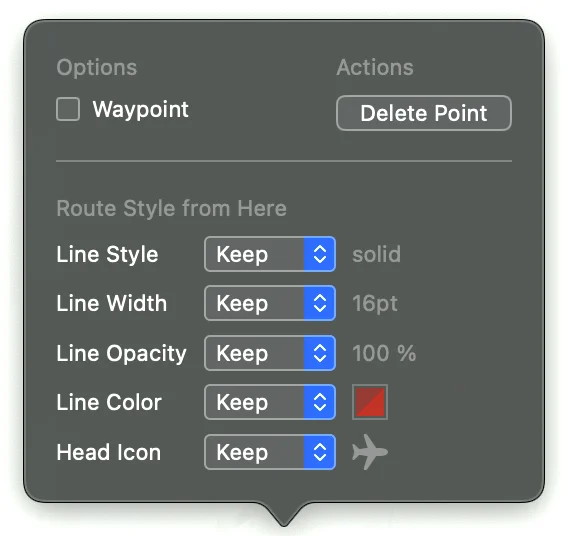
- Right-click on any point to open the Route Point options popover.
- In the popover, click on Delete Point to delete this point. If you clicked on a curve point, you can also delete the whole curve by clicking on Delete Curve.
- In the popover, click on the “Waypoint” checkbox to toggle the point between a normal route point and a waypoint.
💬
If you made a mistake, just select Undo from the Edit menu to revert the previous step.
Map Options
Click on Apply to leave the Map Assistant. You can now adjust the appearance and behaviour of the map layer and the animated travel route, by adjusting controls in Map Options in the sidebar.
Route Segment
Here you can define which part of the route gets displayed. Usually you want to display the whole route (0%- 100%), but for multi-day routes, you may want to animate just part of the route. In this case adjust the Start and End values until you see the correct segment in the Stage.
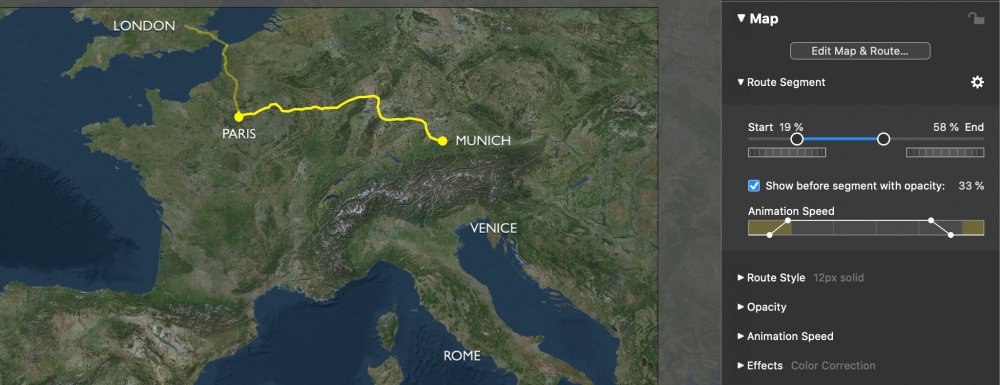
If you chose to display a segment for the second or third part of a route, you can optionally display the previous segments of the route with reduced opacity. This helps to see current segment in the context of the overall route.
The Animation Speed curve defines when and how fast the travel route is animated. If for example you want the map the be visible for a while before that animation starts, and the map to be visible after the route animation ends, then choose a speed curve something like this:

Route Head
If you want an animated icon at the head of your travel route, then click on one of the included icons.
- Click on the dashed outline to select no icon.
- Click on any of the included icons to select it.
- Click on … to load your own icon. We recommend using a PNG file with alpha.
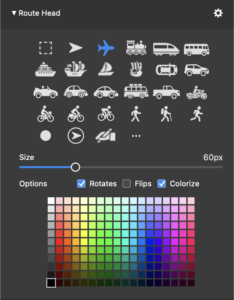
Depending on the icon you chose, you need to set a couple of options:
- Check “Rotates” for icons that should orient along the travel route. This is useful for icons that are seen from above, like the airplane, car (top view), or the arrow.
- Check “Flips” for icons that should always appear upright, like persons, ships, etc. “Flips” will make sure they will change their left/right orientation depending on the travel direction.
- Check “Colorize” if you want to give the icon a color other than black.
Route Style
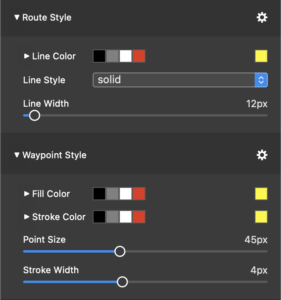
Here you can select the color, line style and width of the travel route line, and of waypoints or location points. Please note that the chosen line color, style and width will apply to the entire travel route. If you want multiple line styles for a single travel route refer to the chapter Multi Style Routes below.
💬
The size of waypoints should be larger than the line width to clearly stand out. You can also set different colors for waypoints to differentiate them from the route line.
Effects
Apply effects like Color Correction, Black & White, Sepia, and Watercolor to modify the visual appearance of a map layer. This requires some degree of experimentation to achieve the desired look. Here is an example:

Multi Style Routes
You can create travel routes with multiple line styles, color, and head icons. First choose the default style and head icon in the Map Options like bescribed above. Then click on Edit Map & Route… to enter the Map Assistant again. Select the Route tab.
Zoom in a bit and right-click on a route point to open the Route Point Options popover. In the lower section of this popover you can change the route line style, width, color, opacity, and the head icon from this point going forward.

The popups in this section have three settings: Custom, Keep, and Default.
- Select “Custom” to change the value from this route point onward.
- Select “Keep” to keep the current value intact.
- Select “Default” to reset to the global value that was chosen for the whole travel route outside the Map Assistant.
💬
Here’s an example: To change a the line style from its default value “solid” to “dotted”, open the popover, switch the Line Style popup to “Custom”, then select “dotted”. At a point further along the route, open the popover again and select “Default” to reset the line style to the default value “solid”.
