Map assistance layer in FotoMagico 6
Simply add or edit your maps slide by opening your map assistance. You can apply one or more effects to a map layer. This changes the visual appearance of the map, but the appearance of the animated travel route is not affected. You can also apply animation to your maps and can also control the speed of it.
Region: The blue frame in the map view indicates which map region will be rendered. you can move this blue frame by dragging it. Drag the corner points or edges of the blue frame to resize it. A label will always display the map dimensions in pixels.
Style: You can choose from many different options of map styles. The visual appearance of the rendered map can also be customized later by applying layer effects. The various combinations of map style and layer effects take a bit of experimentation to find the exact right match.
Location: It helps to mark cities or places that you have visited. They are displayed as circular dots and are always visible on the rendered map. You can add a text label for a location by simply adding a separate text layer above the map layer and positioning it next to the location of the dot.
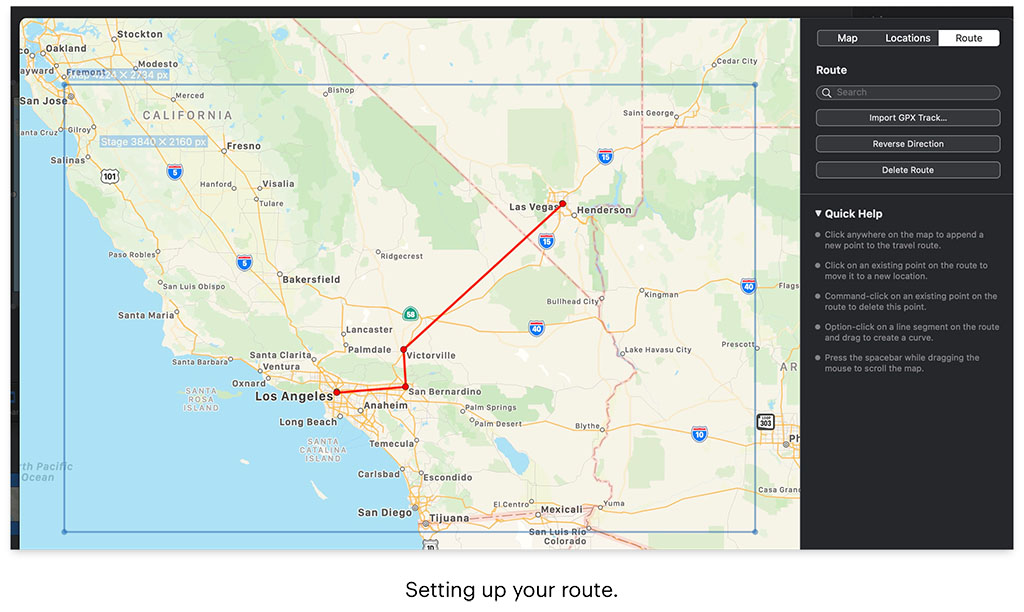
Travel routes assistance
A travel route is displayed as an animated line on top of the map. To add a travel route switch to the Route tab. You can easily do this by importing a GPX file that was recorded by a GPS device or fitness watch or downloaded from the internet, or by creating the route manually by clicking on the map.
Route Segment: Helps you define which part of the route gets displayed. Usually, you want to display the whole route but for multi-day routes, you may want to animate just some part of the route. In this case, change the start and end values until you see the correct segment in the Stage.
The Animation Speed curve defines when and how fast the travel route is animated. You can set it as per your requirements and the effects you want to create.
Route Style: you can select the color, line style, and width of the travel route line. The size of route waypoints and locations should be larger than the line width so that it clearly stands out.
Effects: color correction, black & white, sepia, and watercolor can be used to modify the visual appearance of a map layer. This requires some degree of experimentation from your side to achieve the desired look.